Turning the old flash from IPhone into treasure by making new USB Drive
Since the news had spread a few years ago that the capacity of iPhone could be expanded, many friends had upgraded their IPhones to the larger capacity 64GB and 128GB. The iPhone capacity at hand is indeed bigger. However, it is a pity to see that the replaced 16GB flash memory leaves unused. Now let’s teach you how to use one spare 16GB flash memory to make U disk. Although the U disk is very cheap at present, but It is more excited that if you make one USB drive on your own. Let’s start!
Ready to work:
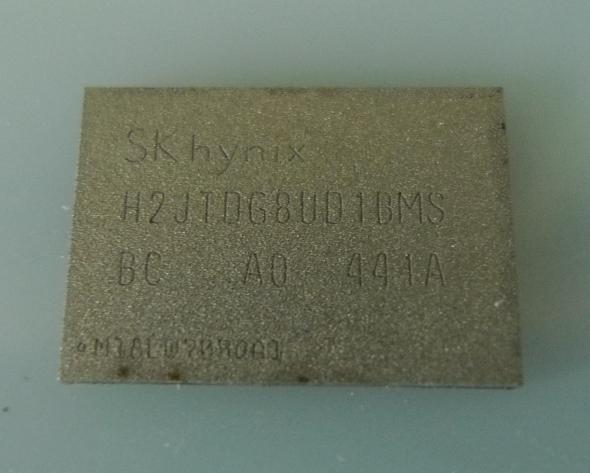
To make one USB flash drive, firstly you must have flash memory, which is the removed flash chip from the iPhone. Due to the solution limitation of USB flash drive, only Hynix 16GB ENAND flash memory can be used at the moment, so it will be useless if you get SanDisk or Toshiba flash instead.
We find one Hynix 16GB flash memory from our stocks; it is the picture as below.
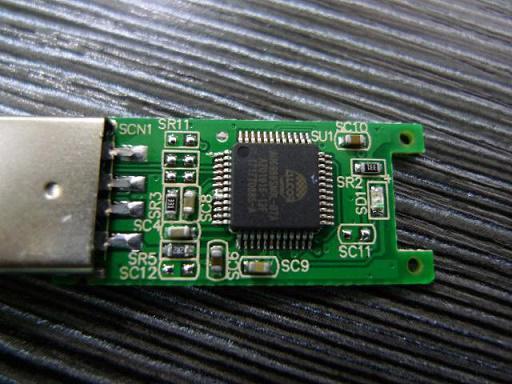
When the flash memory is ready, the rest thing is USB PCB Board. The PCB we mentioned is the semi-finished USB with controller, the only missing part is just flash. I randomly selected one USB2.0 PCB (because of the cheap cost) using the Alcor solution. If you need higher quality, then you can take the innostore USB3.0 PCB, but the price is higher.

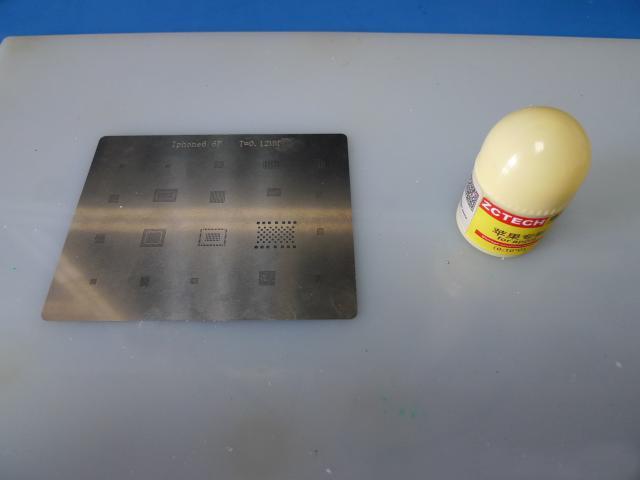
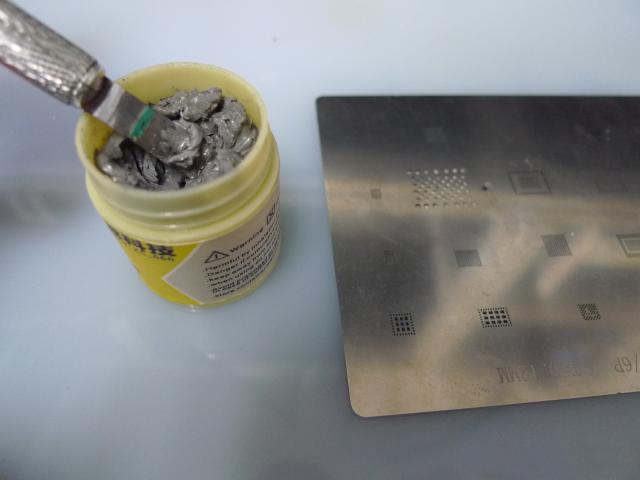
The raw materials are all prepared, but we still need tools. Welding flash memory requires hot air guns, electric soldering irons, and steel mesh and tin paste for re-balling flash memory chips. These things can be bought online. You can choose according to your demands.
Let’s start work if all is ready.
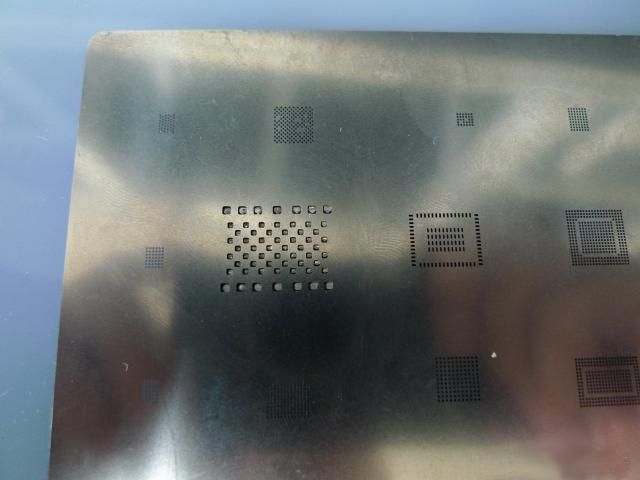
1. Preparing the stencil and tin paste, and beginning to tin the Hynix flash memory.
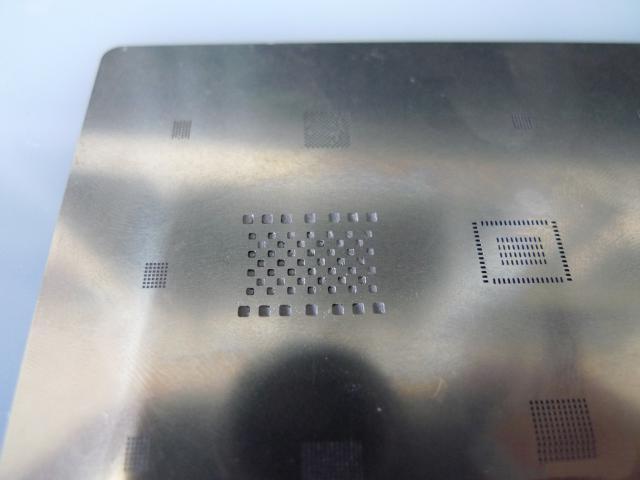
2. Sticking the steel mesh to the top of flash memory, and align the holes in the stencil with the solder joints on the flash memory. (In this step, making sure each solder joint is aligned so that the solder balls are perfectly formed.)
3. Taking one specified scraper to scrape the solder paste on the steel mesh when the solder joint gets done, and making sure the solder paste is evenly painted in each hole. During the process of smearing, you slightly press the steel mesh to avoid any moves of the steel mesh shift; the whole process will be failed if the position of steel mess gets changed.
Wiping off the excess solder paste with dust-free cloth after smearing, let’s fix the steel mesh with tweezers, and turn on the air gun to 240-260 degrees, and the wind speed is 70. Firstly heating the place of the chip for a few turns is to preheat the steel mesh (it aims to prevent the steel mesh from deformation), then the upper right or lower right corner of the chip will be heated (the air nozzle of the air gun should be used at a slight angle), it is getting done until the tin in the steel mesh melting into a ball.

Let’s remove the steel mesh and cool down the flash memory by one side when the tin is planted.

4. Let’s put on one layer of soldering oil to the U disk PCB Board, and correctly place the flash memory chip to the position, then run on the air gun to 295 degrees, the wind speed can be 80-100, and shake the air gun to heat the chip position. (Be sure of even heating. Otherwise, it may cause some places to be welded, some places are not welded, and the chip will be easily damaged if heating one place for a long time.) Tweezers can gently push the chip during the heating. If the chip can be returned to the original position after it, it means the solder ball is completely melted, and the welding can be finished at this time.
5. Let’s plug the USB Drive into the PC for mass production when the welded chip cools down to normal room temperature, (the U disk only can be recognized by the computer after mass production, otherwise it cannot be used)

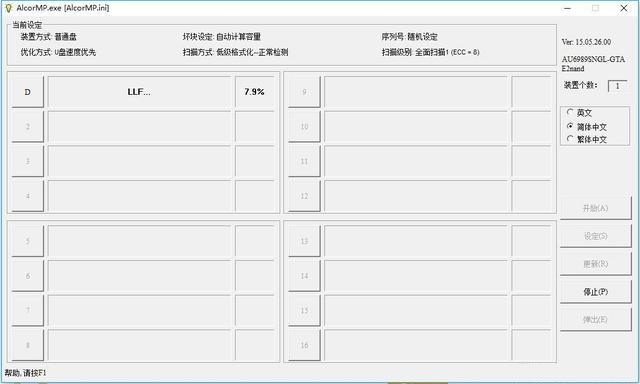
6. Running on the mass production software, you can find the model of the chip, which means that there is no problem with the soldering. Clicking the Start button, then the mass production is running.
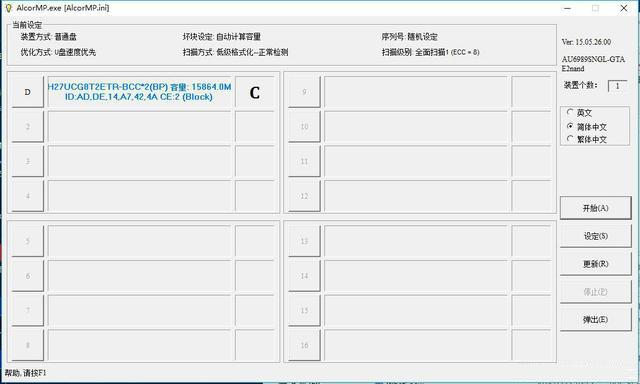
The mass production software performs low-level formatting for the flash memory chip after clicking the start button; it will take longer time around 15mins due to a low-level and full-scale format.
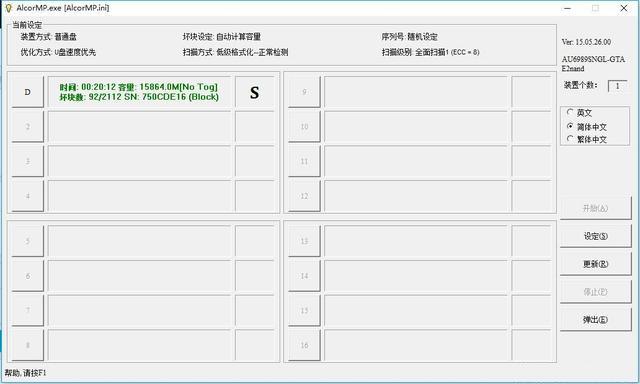
The mass production software will perform advanced formatting after low-level one. This process is very fast completing in a few seconds. Then clicking the pop-up button, let’s remove the USB flash drive from the USB port; the USB flash drive can be recognized when re-plugging into the PC
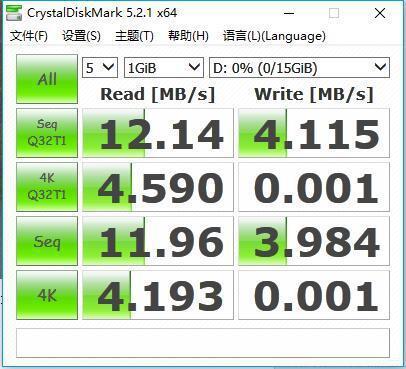
Let’s use the Crystal diskmark software to test the U disk. As I expected, the solution of Alcor Controller + USB2.0 is not fast. It can only reach 4MB/S by Read and 12MB by Write, however, life is one process for struggling, we have to prove what we expect.